

Sooner or later, you run into a limitation of your WordPress theme. You want to customize just that one element that is not within the default options or widgets. Maybe a button needs to be in a different place, you want to tighten up the layout of your forms or you need a piece of extra functionality that the theme simply does not provide.
In such cases, you end up modifying HTML, CSS or even PHP. This is fine, as long as you do it the right way. If you do it wrong, you run the risk of updates being overwritten or your site not working at all.
Therefore, it is important to know the routes for making changes safely and how to prevent a small change from having major consequences.
Safety first
Before you change even one line of code, it's smart to get three things right:
- Make a full backup of both files and database.
- Use a staging environment to safely test your changes first.
- Provide clear rights so that not just anyone can work in the code.
This may seem excessive, but it is basic hygiene. Even a small mistake can render your entire dashboard inaccessible. By working in staging first and only then advancing to live, you significantly reduce the risks.
Disable risky editors
Within WordPress, you will find standard editors to edit theme and plugin files directly from the admin. Convenient, but also dangerous. A wrong comma can take down your entire site, and if misused, an attacker can execute code directly.
Therefore, disable these editors by going into your wp-config.php adding the following:
define('DISALLOW_FILE_EDIT', true);
The official WordPress documentation also recommends this as part of the so-called hardening of your installation.
Why this is important
- Backups and staging ensure that errors do not directly impact your live site.
- Disabling the file editor reduces your attack surface as well as preventing a typo from disabling your admin.
- SFTP remains available for legitimate code modifications, taking advantage of your own IDE, version control and the ability to quickly roll back.
Which route fits your change?
There is no one way to edit code in WordPress. Which route you choose depends on the type of modification you want to make. Always make a conscious choice:
- Minor content modification or embed: use the Block Editor. Choose a Custom HTML-block, or switch to Edit as HTML To work directly in the code.
- A few CSS rules that apply site-wide: add them via Customizer > Additional CSS, so that with live preview you can see the result immediately. For larger style changes, a child theme is better, where you load your own stylesheet.
- Structural theme changes or templates: always do this in a child theme. If you modify the main theme, you will lose the changes in the next update.
- Loose scripts or small PHP snippets: place them in a snippets plugin instead of directly in
functions.php. That way, you prevent an error from crippling your site and keep an overview. - Larger adjustments: work locally in your own IDE, use version control and put changes live via SFTP. Avoid the built-in Theme Editor.
In the following sections we explain each route in more detail, with explanations, examples and practical tips, so that you know exactly when and how to use the method
safely applied.
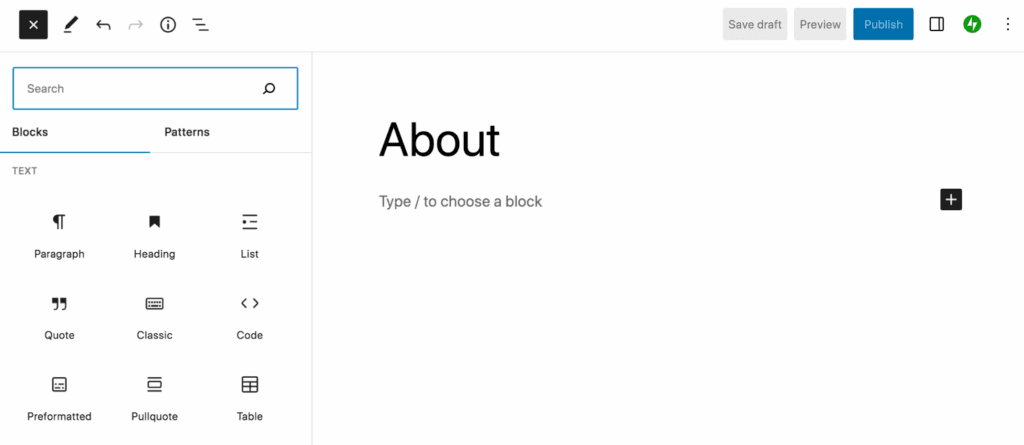
Editing HTML in the Block Editor
Most WordPress sites today run on the Block Editor (aka Gutenberg). With it, you build pages and posts with blocks for text, images, videos and more. For most customizations, you just use those standard blocks, but sometimes you want to work directly in the HTML - for example, to get an embed right, add an extra attribute or insert a piece of markup that your theme doesn't support.
Within the Block Editor, you have three options for this:
- Custom HTML block - Add a block and paste your own HTML. Ideal for individual widgets, buttons or embeds.
- Edit as HTML - modify the code of an existing block, for example, to fine-tune a link or heading.
- Code editor - switch the entire page to code view so you see all the markup at once.
If you are still working with the Classic Editor, use the tab Text to edit the HTML and the tab Visual to check the result. This is less flexible, but still useful for quick corrections.
Notice: Modifying HTML directly can quickly lead to errors in the structure. Therefore, always check in preview and rely on WordPress' revision function as a safety net.
Customizing CSS in WordPress
With CSS, you control how your site looks: colors, fonts, margins and more. Themes and blocks bring default styles, but often you just want to fine-tune - a button in a different color, extra space around an image or a custom font.
There are different routes for that, depending on how much control you need:
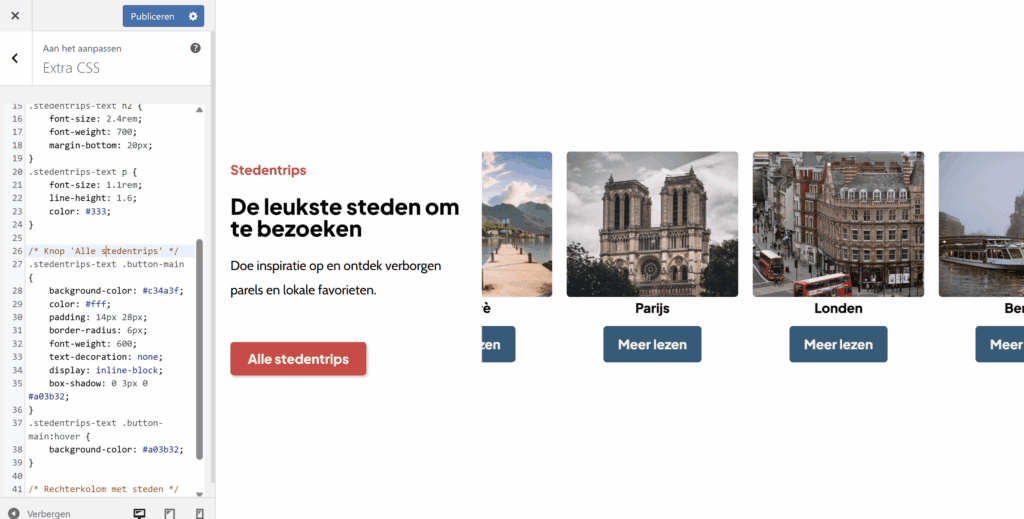
- Additional CSS in the Customizer - via View > Customizer > Additional CSS add your rules and instantly see a live preview. Perfect for small, quick adjustments without diving into files.
- CSS per element in a page builder - If you use Elementor or another builder, you can often enter your own CSS directly at an element or widget. Useful for one-off tweaks, though it quickly becomes cluttered if you use a lot of individual pieces.
- Stylesheet in a child theme - For larger or structural styles, this is the best approach. You place your rules in
style.cssof your child theme and load it withwp_enqueue_style(). This keeps your changes neatly saved in case of updates and allows you to work with version control.
Opinion: For quick corrections, the Customizer or page builder is fine, but as soon as styles pile up, it's smarter to switch to a child theme. That way you keep an overview, you can test consistently and you avoid CSS scattered in different places.
Customizing theme files with a child theme
Sometimes CSS or loose HTML won't get you far enough. If you want to change the structure of your theme, for example the header, footer or the way blog posts are displayed - then you have to make changes in the theme files themselves. Never do this directly in the main theme, because your changes will disappear with the next update.
The solution is a child theme. With this, you create a small extension to your existing theme: it retains all the functions and styles of the parent theme, but you can overwrite specific files or add additional logic.
A child theme consists, at a minimum, of a folder in wp-content/themes containing a style.css (with a short header indicating the parent theme) and usually a functions.php to load styles and scripts. If you want to change a template file, copy the file from the parent theme to your child theme and modify it there. Anything you don't copy stays automatically from the parent theme.
Read all child themes within wordpress here
Examples of common adaptations:
- A modified header or footer by
header.phporfooter.phpoverwrite. - Fine-tuning blog views by
single.phporcontent-single.phpcopy and edit. - A custom page template create by adding a new file, such as
page-contact.php.
Tip: delve into the template hierarchy from WordPress. With it, you can see exactly which file is loaded for which page. This prevents guesswork and ensures that you always overwrite the correct file.
Add snippets and loose scripts
Sometimes you want to add a small piece of code or an external script to your site. Think of a tracking tag, a script for a chat widget or a small PHP extension. You could do this directly in functions.php or in your theme files, but that is risky: one mistake can make your site unreachable, and when you update, you lose the changes.
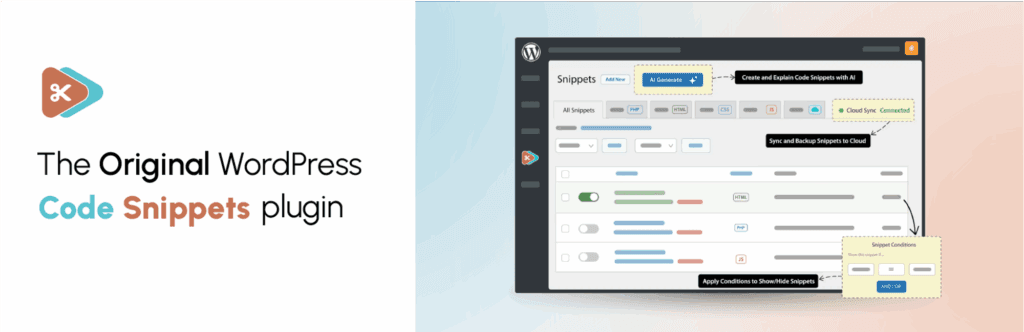
A better solution is to use a snippets plugin. With it, you manage individual snippets of code as if they were mini-plugins. You name them, can easily turn them on or off, and keep them separate from your theme. Two commonly used options are:
- Code Snippets - ideal for PHP snippets, such as an additional function or filter.
- Head, Footer and Post Injections - useful for scripts running in the
<head>or just before</body>should be loaded, such as a Google Analytics tag.
A GA tag is a good example: you always want to load this script correctly, regardless of which theme you use. By placing it via a snippets plugin, the code is preserved during updates and you can determine per environment (staging, production) whether the script should be active or not.
Opinion: Use snippets-plugins for tracking codes, small extensions and loose scripts. Once you add more complex logic or build structural integrations, it's better to house them in a child theme or your own versioned plugin.
Larger modifications via SFTP
For small tweaks, you can get by just fine with the editor, CSS or a snippets plugin. But as soon as you make larger or structural changes, such as new templates, complex features or multiple files at once, it's wiser to work outside the WordPress dashboard.
The professional approach is to develop locally in your own IDE (e.g., PhpStorm or VS Code) and send the files via SFTP to the server. This way, you have version control at your disposal, you can test safely in a staging environment, and only then do you put the changes live in a controlled way.
A good work routine looks like this:
- Download the original file before adjusting anything.
- Work locally in your IDE, with linting and debugging enabled.
- Upload via SFTP and test the change.
- Doesn't it work? Immediately restore the original file to avoid downtime.
This route requires more discipline, but provides maximum control and security. You are not dependent on the Theme File Editor in the dashboard. It's better to disable that, because one mistake can block the entire site.
Opinion: Always use SFTP for larger changes and combine it with version control, for example Git. That way you can track your work step by step, roll back if something goes wrong and keep an overview, even if multiple people are working on the same site.
Need help with code or maintenance?
Modifying code in WordPress doesn't have to be a risk, as long as you choose a safe route that fits the change you want to make. Small tweaks are easily picked up in the editor or with Extra CSS, larger changes belong in a child theme, a snippets plugin or via SFTP. With backups, staging and careful workflow, you keep control and avoid unnecessary downtime.
Don't want to have to worry about this kind of technical operation yourself? At Surver, we build WordPress websites that are set up to be secure and maintainable from the start. In addition, we offer a webmaster service: you can always count on us for quick help or advice, whether it's a small adjustment or complex development. So you can be sure that your site is in good hands.